Progress photos ride along with check-ins: add a photo field to your form and clients upload with each submission — no separate photo feature to manage. (The screenshots below use illustrated demo images.)
1. Add a photo field
In Forms & Trackers, edit your check-in form and add a photo field — set how many files clients can attach and mark it required if photos are non-negotiable for you.
2. Review submissions
Open the client's Forms & Check-Ins tab. Submissions with photos show a gallery — click any photo for the full-size view, or download it.

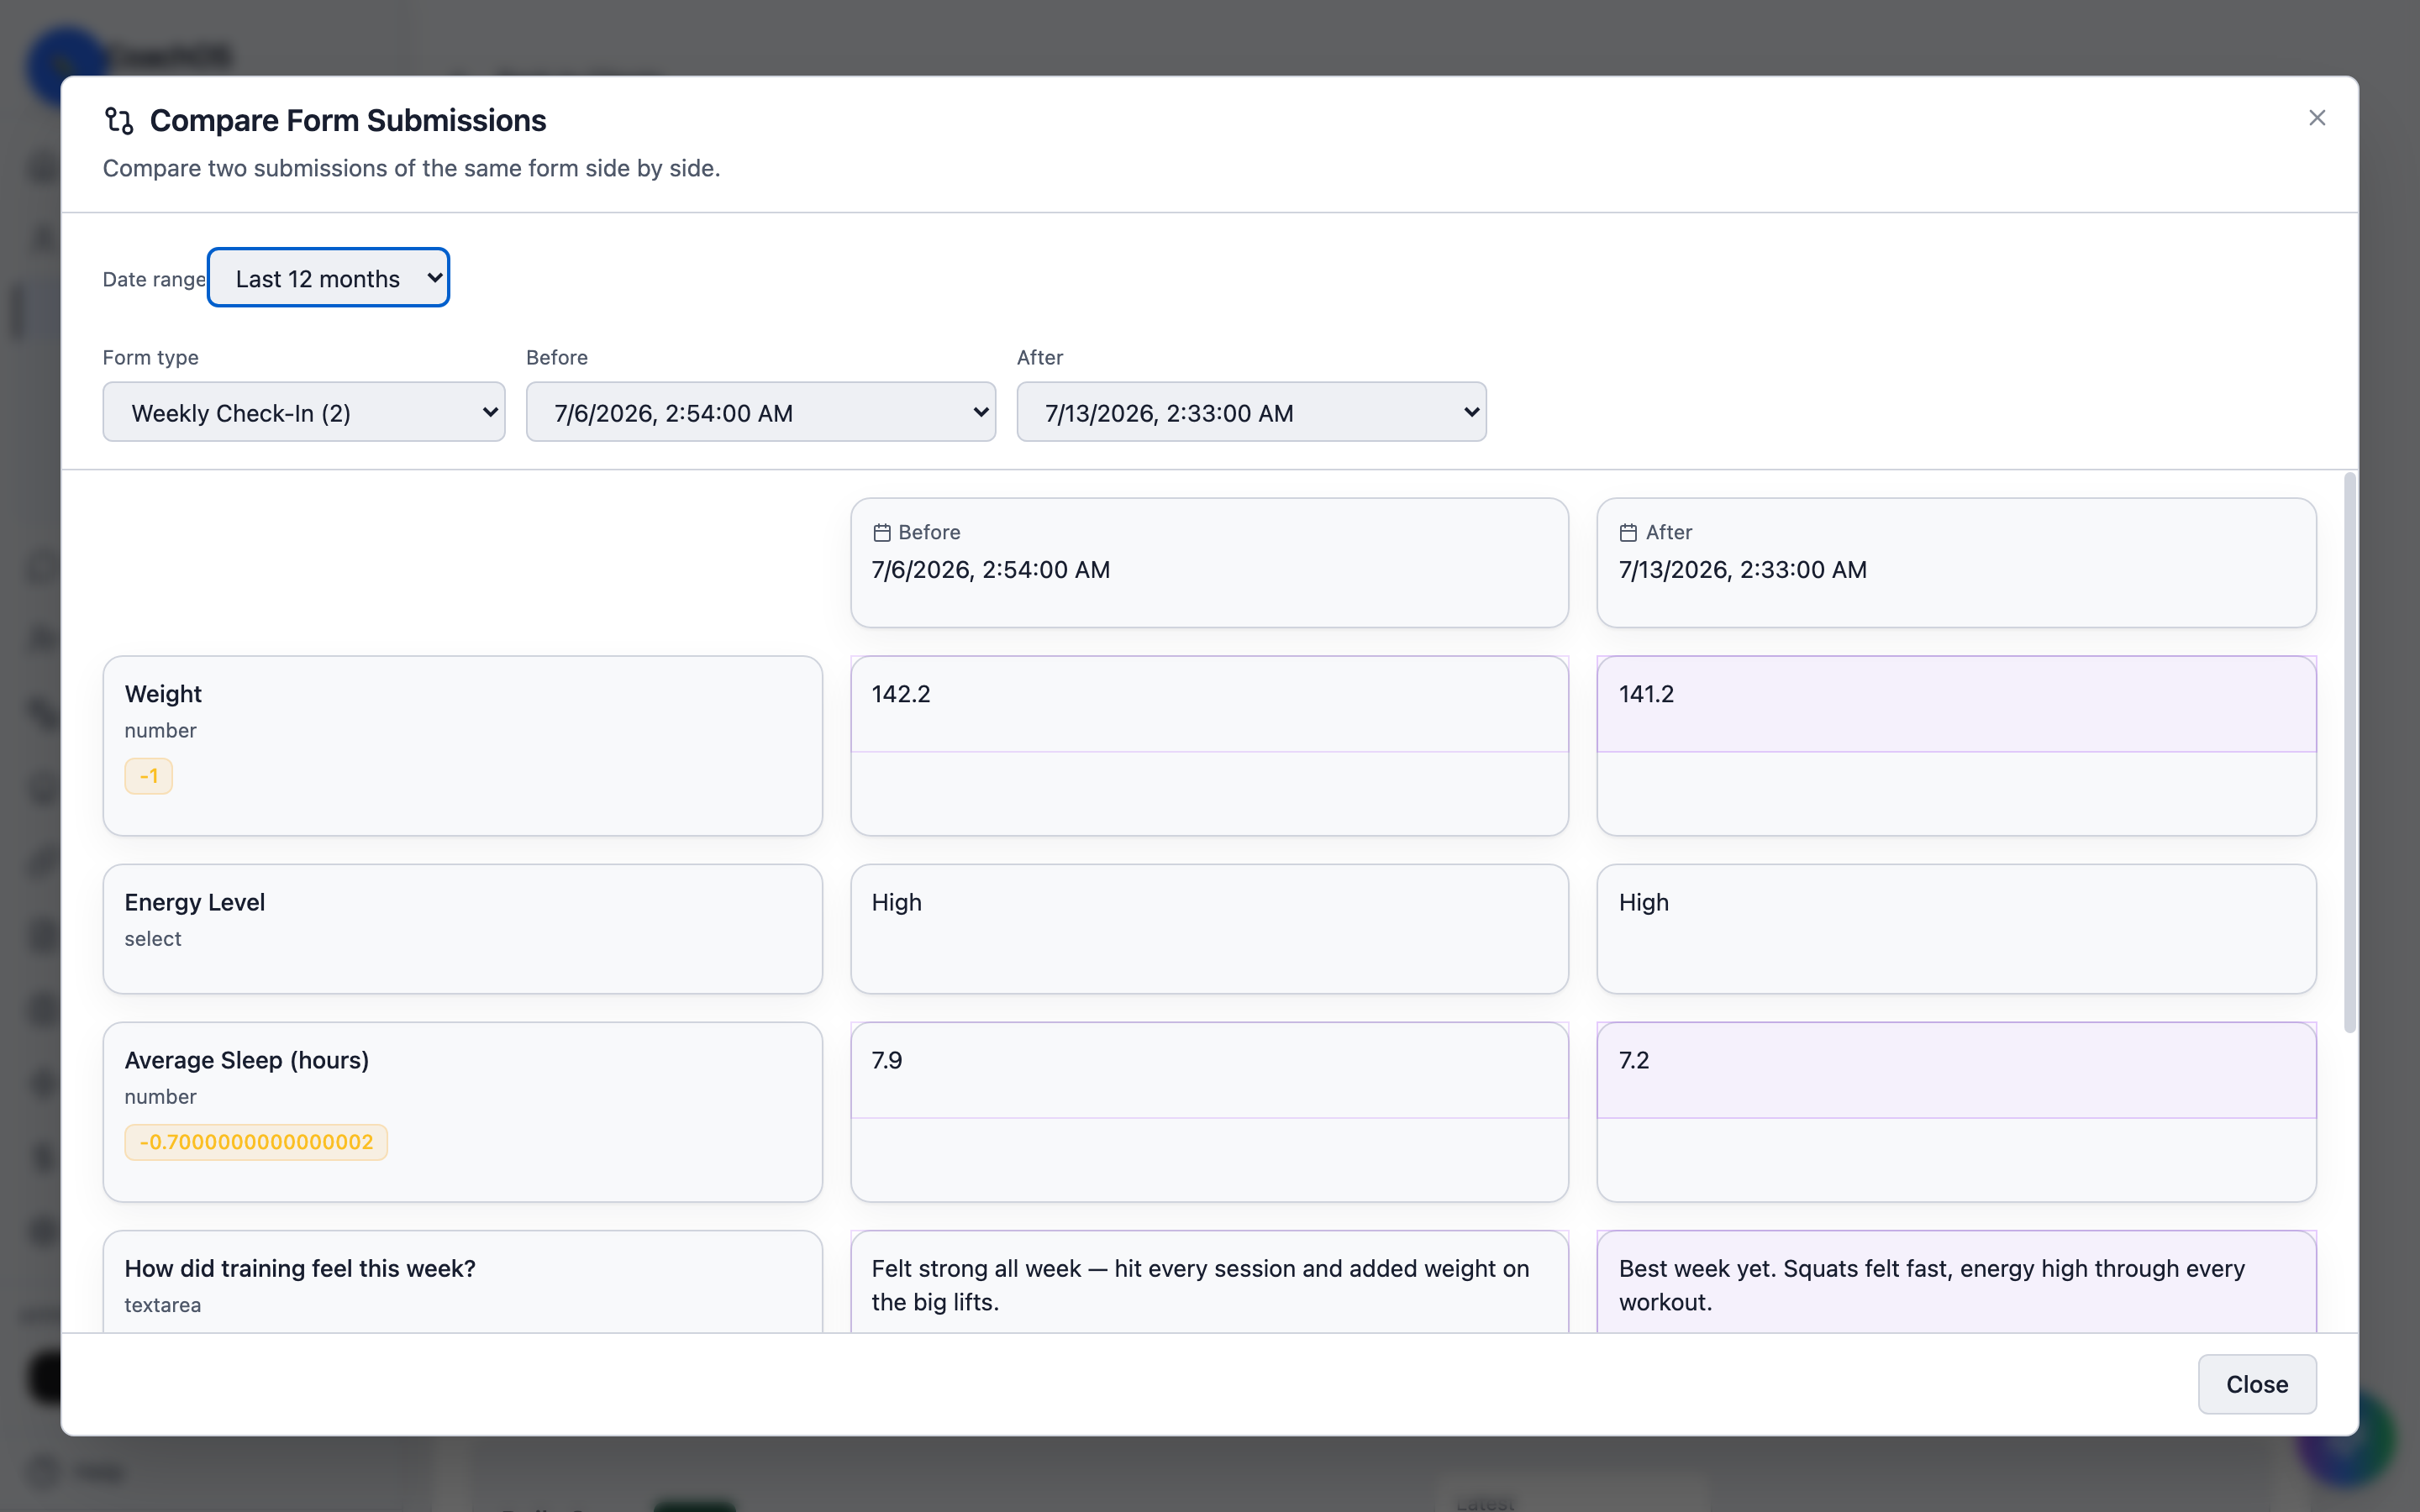
3. Compare before and after
Use the compare view to put two submissions of the same form side by side — numeric answers show their change, and photos from each date line up next to each other for a true before/after.